Sunday, May 9, 2010

How To: Cook For One (or Two)


As a student, or single person, it is difficult to cook for just one or two people... I learned to cook mostly from my father and it was always cooking for an entire family so I had to learn "cooking for 1" the hard way... trial and error. For a really long time I made WAY WAY WAY too much food. It has taken me nearly 4 years... but now that I'm graduating college I pretty much have it down! Warning: it takes some getting used to.

This is actually another big reason I don't use recipes very often: recipes always make 4-6 servings... splitting a recipe in sixths is not practical... nor is it practical for me to eat the same dish for 4 days straight until I hate everything about it.. A lot of times I will get ideas from recipes and then estimate at amounts or improvise based on the ingredients I have available. So, in hopes of helping some others catch on more quickly, I have compiled a list of a few things I have found to be very helpful tricks.

Cooking for One 101:


1. Plastic baggies and cling wrap will save your life!

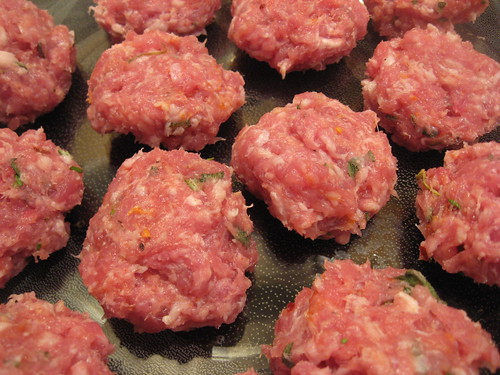
When you buy meat at the grocery store (chicken, sausage, hamburger), while it is still thawed individually wrap it up and freeze it in single portions. Chicken is easy: one breast per bag. You can freeze multiple breasts per bag, just make sure they don't touch each other so you can break out of freezer more easily, instead of them freezing in one big lump. For sausage or hamburger, portion out 1/4 or 1/5 of the meat into balls and freeze. The sausage balls are easier to do with cellophane or press and seal wrap... you can wrap them individually with cling wrap and the press and seal can wrap a bunch of them in one sheet and just seal off individually in between (just press... to seal)! This makes meat for pasta or burgers so much easier to use when you don't have to thaw a giant 2 pound block of meat!


2. When in doubt, BUY LESS

Don't buy too much at once...it will go bad... I promise. You may be thinking, "But I cook every night, I will use 3 peppers, 2 onions, a head of lettuce, and 1 bunch of asparagus.: But let me tell you, NO YOU WONT!!!

Ok, yes, you might have to make a second trip to the grocery store at first, while you are getting used to how much to buy, or for something more specific, but that is better than wasting food by letting all of your produce rot in your refrigerator! Not to mention, since produce is probably the most expensive thing on my grocery list, rotting produce is not good for the student budget!

On the same note... don't be afraid to freeze produce (especially vegetables). If you buy a bundle of asparagus and know you wont eat the whole thing in one week (before it starts getting soggy), freeze half of it (or 2/3) and thaw it out as you need it. Veggies freeze and thaw well! It will still taste fresh!

You can cut peppers and onions into strips for stir fry and throw them straight in the pan, frozen they thaw evenly and quickly! See #1... plastic baggies will save your life; although, I will recommend (for the environment's sake) that you use Tupperware some of the time, or re-use the baggies for more frozen vegetables!


3. Know what you should not freeze

Freezing can be a great thing... some things just don't freeze well, though. They wilt and lose flavor, get soggy, etc. Things with thin leaves, like most lettuce, will wilt easily after freezing because of ice forming in their leaves...same thing goes for Brussels sprouts. Buy them fresh and don't freeze them.

If you're going to freeze fresh herbs layer them in between dry paper towels and then seal them inside a plastic baggie (again... RULE #1) to keep as much moisture out as possible and prevent ice crystals and wilting!


4. The rules of Onion and Garlic


I love onion and garlic... I put them in pretty much everything that I make. Neither of them go bad too quickly, which is nice, but at the same time you don't need 5 onions lying around for one person. Also, you don't use near as much onion in a single dish as you would for multiple servings.

My general rule is one onion can last a whole week (sometimes longer). Garlic, keep it in the refrigerator it will last longer there, but don't buy more than 2 heads of garlic at a time. 1-2 cloves is plenty of garlic for any 1 person dish. See rule #1 for how to store partially used, previously cut onion.

Ginger root: I'll add this here, because I don't know where else to put it. I cook a lot of Asian dishes, and lots of those use fresh ginger. Ginger root, though is a strong flavor, and you can't use a lot of it quickly. The best way I've found to deal with this is to peel the ginger root while it is fresh from the store. Then freeze it (see rule #1 again). you can take it out of the freezer anytime you want and grate off however much you want, then pop it back in the freezer.


5. Keep a well stocked Spice Cabinet/ Pantry

BARE MINIMUM: salt, black pepper, red pepper flake, garlic powder, onion powder, Italian seasoning, cinnamon, olive oil, vinegar (balsamic, white whine, cider), vegetable oil, flour sugar, eggs, milk, butter, vanilla, rice, noodles


HIGHLY SUGGESTED: chili powder, blackening seasoning, poultry seasoning, ground ginger, cumin, chocolate chips, basil, rosemary, thyme, oregano, bay leaf, 5 spice blend (Asian), paprika, cayenne pepper, nutmeg, soy sauce, sesame oil, rice whine vinegar, Worcestershire sauce, lemons/ lemon juice, Parmesan cheese


6. Don't be afraid to improvise!


This rule is the most important rule (Even more important than #1). Use what you have and get creative! Use the same ingredients in different ways. Even if you only have a fourth of a bell pepper left: bell peppers-Asian stir fry, stuff them, Italian style pasta, soups, sauces, pizza, sandwiches, pita, etc. The list is never ending!

Thursday, May 6, 2010

Seared Tuna Steak


SOOOO simple... one of my favorite easy dishes. The only difficult thing can be finding fresh tuna steak at a grocery sore in the mid-west. When I find it, I always buy some!

What you'll need:
2 cloves garlic, chopped
red pepper flake
soy sauce
sesame oil
shallot (or onion)
ginger (ground or freshly minced)
olive oil
black pepper

All you do: Make just enough of the marinade to cover the tuna steak. Marinate the tuna in this mixture for about an hour (30 min would be fine). Heat up a skillet (or grill) to high heat and sear on each side for about 2-3 minutes. Watch it closely and don't overcook it. You still want it to be rare in the middle... at least I do! I usually blanch some edemame and light salt it for a side dish! Fresh, light, and irresistible in my book!

Friday, April 23, 2010

Brussels Sprouts


I recently discovered that Brussels sprouts are nothing like the stereotypical disgusting vegetable! I would rather eat these than broccoli any day. That, in itself, doesn't say much because I hate broccoli. However, I should make a better statement about them, because I actually really enjoy Brussels Sprouts, especially when they are cooked well and topped with a little grated Parmesan cheese! They are also super fast, easy to make...and really difficult to screw up.

All you do:
  • Cut off the hard white ends of the Brussels sprouts
  • Boil and salt a pot of water
  • Blanch the Brussels sprouts for 5-6 minutes (until tender)
  • Saute some sliced shallot and garlic in a little butter and olive oil
  • Toss in the Brussels sprouts and saute for a few more minutes
  • Season with salt and pepper to taste
  • Top w/ freshly grated Parmesan cheese if you want (I am a firm believer that everything is better when topped with a little bit of cheese)
Don't be scared off by June Cleaver's version... even though Beaver makes it seem that Brussels sprouts are the grossest vegetable out there... I promise they are actually really good!

Sunday, March 28, 2010

Tilapia in a Pouch


I have been eating a lot of fish lately. Its tasty, good for you, quick...what else can a college student ask for (other than cheap)! Anyway, I usually just season the fish however I want it and then cook it in a skillet on the stove for a few minutes each side. Last time I wanted to try and bake it! The whole oven seemed like a waste for one tiny piece of fish, so I baked it in my little toaster oven...it turned out great!

What You'll Need:
  • Tilapia filet
  • olive oil to drizzle
  • salt/pepper
  • garlic
  • onion
  • mushrooms
  • red peppers
  • lemon slices
Now, this is just the way that I did it... you can use any combination of spices and vegetables you want in this. You could do it Asian style with some water chestnuts, soy sauce, bamboo chutes, and bok choy... Mexican style with tomatoes, peppers, onion, jalapeƱo, and taco seasoning... Italian style with fresh basil and lemon etc... really, the possibilities are endless.

All you have to do is sliver up the vegetables, chop your garlic, slice your lemon, season your fish, wrap it up in a foil pouch, and bake it at 375 degrees for 30-40 minutes until the fish is flaky. The worst part about baked fish is usually the tendency to dry it out. When it is wrapped up in the pouch though, it holds in the steam and the fish is pretty hard to overcook.

Saturday, March 20, 2010

Bleu Macaroni and Cheese


I first made this dish for Thanksgiving dinner 2 years ago. It was a minor disaster (equivalent to a small California earthquake)! I don't mean the flavors were a disaster, they were great, it was more of the proportions that were "off," to say the least.

Long story short: the recipe I followed said to use 2 cups of macaroni to serve 2 people. I quadrupled the recipe in order to serve it as a side dish at my big family Thanksgiving dinner. Does anyone know how much 8 cups of macaroni is once you cook it? It's probably enough to feed the entire population of Wyoming for about a week...

Needless to say that we had WAY to many noodles, not enough sauce, and nowhere to put it! However, I didn't realize the noodle sauce ratio would be off until after I mixed it all together and filled up 6 casserole dishes with the macaroni.

Conclusion: Flavor= fantastic; Proportions = disagreeable

ANYWAY: we figured that the recipe must have meant 2 cups cooked macaroni, not 2 cups uncooked macaroni... either way I still think that would have been too many noodles... I have fiddled with the proportions and come up with this: a good noodle sauce ratio that makes ONE casserole dish of gourmet macaroni and cheese.

What you'll need:
2 3/4 cups elbow macaroni (uncooked)
3 cups whole milk
8 oz. Gruyere cheese
6 oz. Sharp White Cheddar
4 oz. Bleu cheese (I love a great Roquefort)
pinch of nutmeg
4 Tbl. butter
4 Tb. flour
salt and pepper to taste
breadcrumbs and dried basil for topping

Warm the milk in a sauce pan over medium heat. In the meantime use the butter and flour to make a roux (melt butter and sprinkle in flour and cook for a few minutes until lump free and doesn't smell like flour any more--should be golden colored). When milk is simmering, add the roux and thicken to a saucy texture. Add in the pepper and nutmeg for flavor (don't add salt until after you've added cheese... you probably won't need any).

When the sauce has thickened, remove it from the heat and stir in the monstrous pile of cheese that you've convinced your family to grate up. Stir in until incorporated and smooth. Pour the sauce over cooked noodles in a baking dish. Sprinkle the breadcrumbs and basil over the top before baking.

Bake for 30-45 min at 400 degrees or until the cheeses are bubbling and the top is crispy and browned. It wont need the full 45 minutes unless you refrigerate it overnight before cooking...could be done as soon as 20 min. Just watch for bubbly cheese!

Monday, March 15, 2010

How To: Spruce up Sauce from a Jar


Welcome to the first of (hopefully) many in the " How To" series! This firs t one is just an easy way to spruce up any pasta sauce from a jar. You don't have to make homemade sauce if you want great flavor, but you also don't have to settle for just the typical jar sauce either.

Here's what I like to do:

  • Saute a few cloves of garlic and some sliced onions in olive oil
  • Slice up Italian sausage and throw in with onions (ground sausage fine too... whatever you have)
  • Pour in jar of sauce (vodka sauce is what I had... anything you like will do)
  • Add a few tablespoons of balsamic vinegar or a full flavored wine if you like-reduce the sauce to your liking
  • Add in some chopped fresh basil or parsley. Wilt the herbs as you stir them in and add some freshly graded Parmesan Cheese
  • Pour over your favorite noodle (whole wheat penne) and enjoy!

Wednesday, March 3, 2010

Spicy Asparagus Pasta


"Asparagus made into a pasta sauce...interesting..." That's what I thought too. Honestly, the first go round was "interesting" at best.

The original recipe I found used asparagus, but also called for A LOT of parsley in the sauce. Don't get me wrong, I like a little parsley here and there to lighten up a dish. However, I think my sister said it best when she pointed out that the first attempt tasted quite similar to grass.

I still liked the idea of the asparagus pasta sauce, though so I have fiddled around with this dish a few different times and the current (parsley free) version is by far one of my favorite vegetarian dishes.

What You'll Need:
Asparagus (estimate-depends on how much you're making, I used about a half a bundle)
3 cloves garlic (obviously increase if you make more)
Olive Oil
Salt and Pepper
Red Pepper Flake
Parmesan Cheese
Whole Wheat Spaghetti

Cut the asparagus into 1 inch pieces and blanch in boiling water for about 5 min. Ice it immediately to stop the cooking, blend up with garlic, olive oil, red pepper flake, and salt pepper. The seasonings are all just to taste. I love spicy food so I like to use about a teaspoon of red pepper flake to give it some heat! Use as much olive oil as you need to get to the consistency you want... probably a couple of tablespoons will do.

The end product is sort of like an asparagus pesto, mix over whole wheat noodles with freshly graded Parmesan. Genius...quite a change from its grassy beginning

Monday, March 1, 2010

Ye Big Ol' Pot of Irish Stew


So, I must admit that this post is LONG overdue!!! I promise the cooking has continued even though the blogging has not. This has left me with a long list of delicious concoctions that deserve a proper posting, although most likely they will receive a castrated version of their former glory (however, some cultures really value eunuchs).

I digress: this pot of stew was the perfect winter warm-me-up and it fed my 2 roommates and me for about a week and a half! The thing that makes this stew so great is the really rich broth. Don't get me wrong the medley of delicious veggies and perfectly tender meat was scrumptious, but the broth was so flavorful that I could have lived off the liquid alone for a week and a half and still been satiated.

The other great thing was how easy it was: chop, stir, wait, stir, wait, stir, eat, stir, eat...you get the idea.

What you'll need:
1 1/2 lb. Stew Beef
1 lb Red Potatoes
1 lb Yukon Gold Potatoes
1 Large Yellow Onion
3 c. Carrots, Chopped
4 stalks Celery, Chopped
1 Large Head of Garlic (8-10 cloves)
6 c. Beef Stock (I like starting with low sodium so I can control how salty to make it)
1 c. Red Wine (anything will do, I used a Pino Noir)
1 1/4 c. Guinness (almost one whole big can of theirs)
1 Tbl. Dried Thyme
1 Tbl. Sugar
Salt and Pepper to taste

All you do: Chop your meat into 1 inch cubes and brown in the pot with some olive oil. after a few minutes add in the crushed garlic (don't chop it even if you're tempted, the smashed cloves will break up and then later you get sweet garlic pieces...yum!). After another minute or so add in your stock, wine, Guinness, tomato paste, Worcestershire's, and herbs. Let the mixture boil and then reduce the heat to low and cover.

While the beef and liquids are simmering away, cut up all of your vegetables then brown them in a big pot with the butter (about 15 min or so). They don't have to cook through, they will do this in the stew, but it gives them a little more of a caramelized flavor.


Add the veggies to the beef and broth mixture and simmer for another 30-40 minutes. Stir every once in a while to prevent sticking to the bottom and sides. Thicken if you want to with a little roux of cornstarch or flour and water (I didn't find this necessary. It's stew, not a thick soup, I liked the thinner broth with the chunky veggies). Make sure to remove the bay leaves before you serve it.

Honestly, I don't usually even like stew. But this one will become a yearly tradition... maybe even bi-yearly (and that's saying a lot for me)!