Showing posts with label 5 Ingredeints or Less. Show all posts

Friday, July 26, 2013

Southwest Tacos: 15 minutes, 5 ingredients


Even though I really enjoy cooking, sometimes when I come home after a long day at the hospital, I really don't want to spend a lot of time cooking and then have to clean up all the dishes. Also, when I get home from the hospital I am usually STARVING!

 This dinner is nice because it's quick, only dirties one pan, and makes plenty of leftovers! The other nice thing is even when I haven't been to the grocery store in a while, I usually have all of this stuff on hand. Enjoy.

Gather up the stuff:
1 pound ground meat (turkey, chicken, beef)
1.5 Tbl. taco seasoning
1 can corn (rinsed)
1 can black beans (rinsed)
1 cup salsa

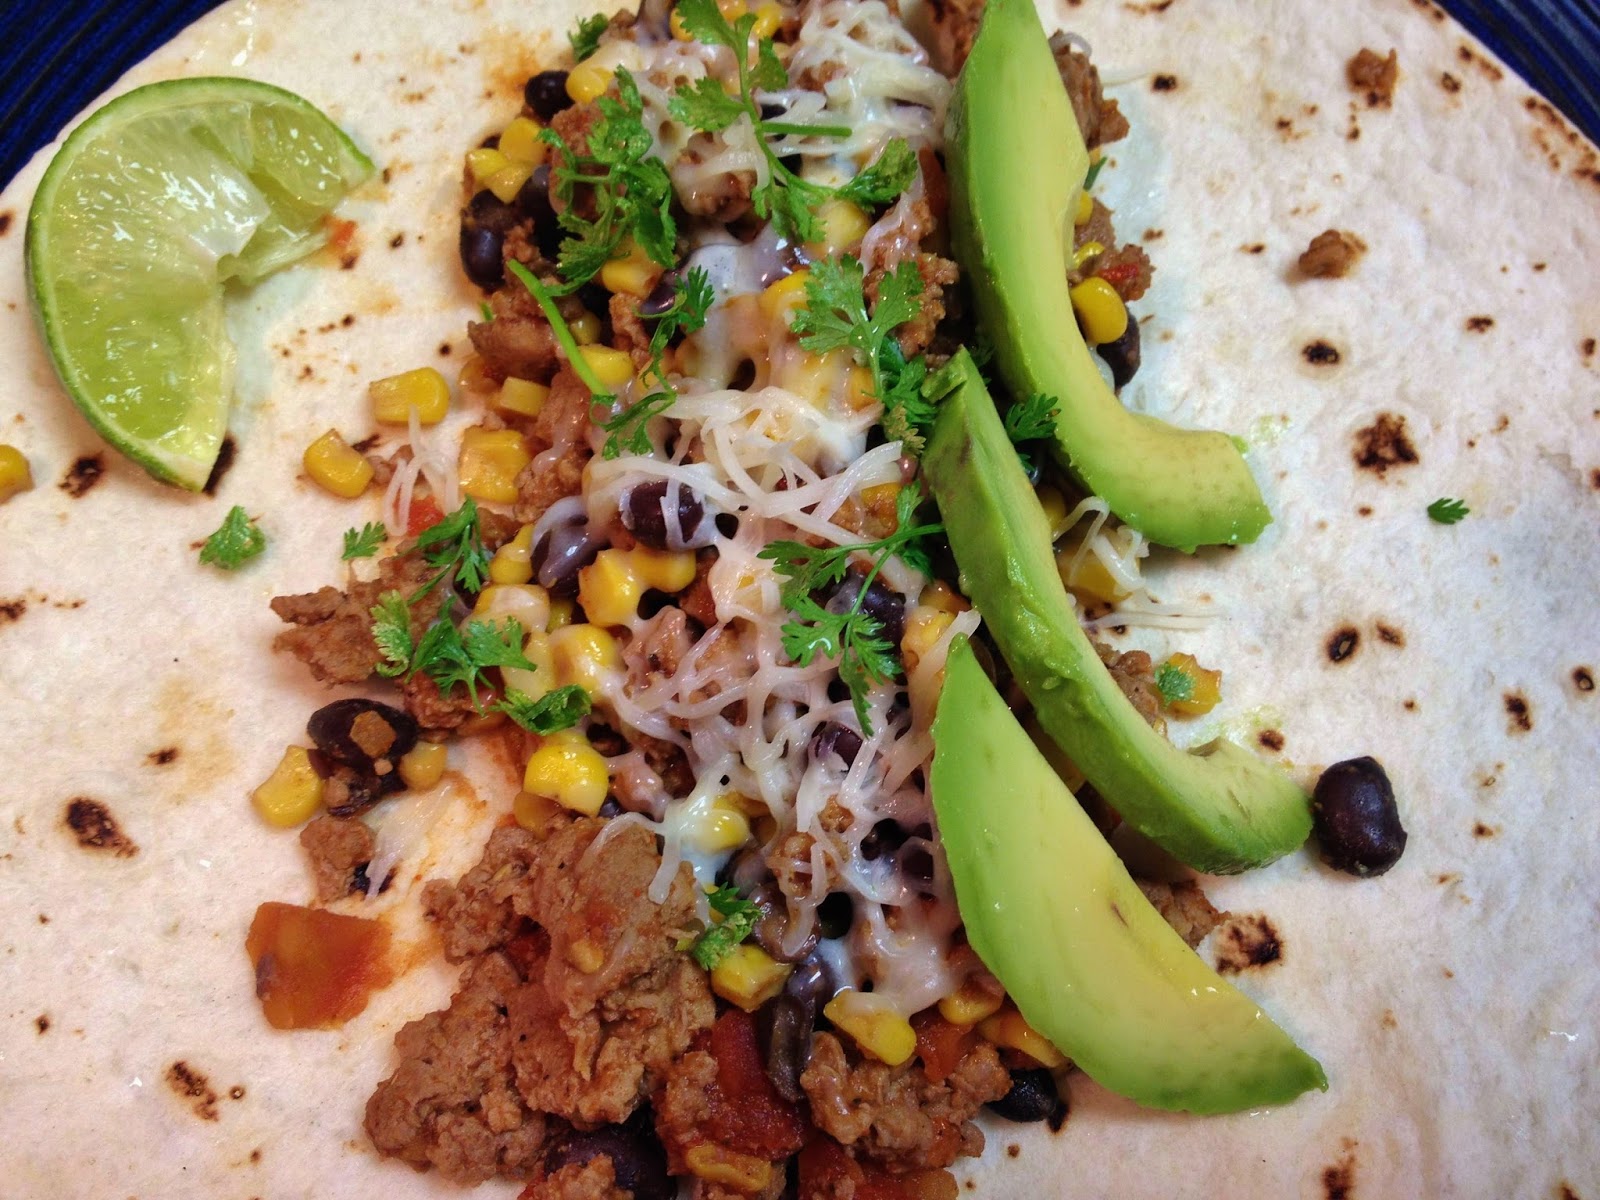
Saute the meat and taco seasoning together add in the beans, corn, and salsa and warm it up and... Ta-Dah...you're done! Add on some cheese and tortillas and it is good to go.

I just happened to have some fresh lime and avocado around and I used some cilantro from my herb garden, but I've made this tons of times without the fresh ingredients and it is still really delicious.

This warms up well left-over, too. It actually makes really good nachos! They are also pretty low-cal, especially if you don't use beef. Use plain Greek yogurt instead of sour cream to cut down on extra calories also.

One batch of this will feed Ben and me for at least 2 dinners and 2 lunches.


Saturday, May 25, 2013

Ben's Banana Burrito


In 2nd grade we had to memorize a poem and recite it for the class. This was mine:

BANANANANANANA, by William Cole. 

I thought I'd win the spelling bee 
And get right to the top
But when I started spelling Banana
I didn't know when to stop. 

I know that is a random tangent to start with, but anytime I type out the word "Banana" I think of this poem and it makes me smile.

To get to the point, I like bananas, but I like them a whole lot more when they are paired with probably the best food ever created NUTELLA!!! Ben think's I am crazy for how much I love nutella because I"ll just eat spoonfulls of it sitting on the couch or while studying. What can I say, it's delicious.

Anyway, Ben makes really good breakfast and even though this one is super simple it is sooo good! Melty and warm on the inside but crispy on the outside!

He just spreads the peanut butter or Nutella (using both is the best) on the inside with the sliced banana and wraps it up. Then he toasts it in a hot, dry pan to brown the outside and warm up the inside so it is all gooey and crispy.


Really simple, execution is super easy, but it is the genius idea that counts!

Wednesday, April 4, 2012

Fish Tacos with Cilantro Lime Slaw


Simple weeknight dinner. Fish Tacos! So medical school is kind of busy. On top of that, It's my second year and I am preparing to take boards in just a little over a month. This mean that I don't really have a lot of extra time to make fun, new, time consuming recipes. This one is SOOOO simple and quick. It only takes as long as it takes to cook the fish. Assemble, scarf, back to studying (unfortunately)!

What you need (or at least what I use)
  • Frozen Parmesan Encrusted Tilapia
    • At Sams Club they sell big bags of frozen parm crusted tilapia... it's quick and relatively healthy so I usually always have it on hand. 
    • The parmesan crust in this adds a nice extra crunch almost like it's fried fish in the taco... without the extra deep fried calories (and mess)
  • Cole slaw/ shredded cabbage mix (from a bag)
  • Chopped fresh cilantro
  • Sliced fresh green onions
  • Lime juice (preferably from a real lime, not a hollow plastic lime)
All I do
  • Season with a little onion powder, chili powder, and cayenne (a little goes a long way)-bake according to directions
  • Mix together cole slaw mix, chopped fresh cilantro, sliced green onions, lime juice, and olive oil
    • For every half bag of cole slaw I use about a cup of cilantro, 4 green onions, the juice of half a lime, and a couple tablespoons olive oil
    • Do the lime juice first so the acid can coat everything, then drizzle a little olive oil to mix in, season with pepper if you want
    • It will taste pretty limey, but it's REALLY good on the tacos!
  • Once the fish is done, chunk it up with forks, put in in tacos with the slaw, cheese and your favorite fish taco sauce. 
    • Our favorite Mexican restaurant is right across the street so I use theirs, but if you don't have a go to fish taco sauce try this creamy jalapeno ranch sauce 
    • I'm also a big fan of home made guacamole or sliced avocado on these tacos!
  • Wrap everything up together in a nice warm flour tortilla! MMMM
If you don't have the parmesan crusted tilapia, or don't want that extra breading, baking non-breaded tilapia in a little lime juice with the same spices would work great! 

Sunday, November 6, 2011

Pumpkin Cake with Spiced Apple Glaze


The easiest cake you will ever make, and it is dense and moist so it is the perfect last minute fall dessert!

Pumpkin Cake
1 box yellow cake mix
1 15 oz can of pumpkin

Using a hand mixer mix together the cake mix and the can of pumpkin. It will come together in a thick creamy batter. Pour the batter into a greased 9 inch square pan. Bake at 350 degrees for 28-35 min until toothpick comes out clean.

Apple Spiced Glaze
1 1/2 cups powdered sugar
3 Tbl Apple juice (or apple cider)
1/2 t. cinnamon
1/4 teaspoon ginger
1/8 teaspoon nutmeg
1/8 teaspoon ground cloves

Mix all of the glaze ingredients together pour over the cake while it is still warm. If you want it to be extra gooey and moist poke some toothpick holes all over the top before you cover it with the glaze. I like to pour a little bit over the whole thing and let it soak in before I add another layer of glaze and do the same thing again. Usually 3 times is enough, just making sure it is all covered and soaked in the spiced glaze!


Sunday, October 9, 2011

Almost Mama's Chili


In past posts I may have made my mom seem like the worst cook on the planet... this, in reality, may have been a creative hyperbole. It's just a running joke in my family because my dad does most of the cooking. My mom does the baking.

My dad is a great cook... he taught me everything i know (almost), but he once tried to broil a cake for my mom... obviously NOT the baker of the family!

My mom, on the other hand, is great at baking. She makes a mean chocolate sheet cake, amazing almond poppy-seed bread, and so many others, but she is lacking in the creativity and guess work that my dad has in the cooking area. HOWEVER, there are about 3 or 4 things that my mom cooks extremely well, and she could do it with her eyes closed! One of these few things is her Chili! YUUUUUMMMM, Chili!

I grew up eating this chili at least a couple times a year in the winter, and it was always one of my favorites! So, naturally, when I moved out, I missed it and had to learn to make it on my own. The recipe changed a bit when moving hands from mother to daughter, but either recipe is great, comforting, and filling... a pot of it would feed me in college for about a week!

Enough of this though... here's the recipe:

What you'll need:
15 oz Brooks Chili Hot Beans
3 (8 oz) cans of tomato sauce
1.5-2 lb ground beef
1 medium white onion finely chopped
6-8 cloves garlic, minced
2-4 Tbl. chili powder
1-2 Tbl. Sugar
Paprika (1/2 Tbl.)
Cumin (2 tsp.)
Nutmeg (1 tsp.)
Cracked Black Pepper (to taste)
1-2 tsp. Salt (to taste)
Cayenne pepper for extra spicy-ness! (add slowly, to your specific heat preference)

Brown the ground beef, chopped onion, and garlic together in a pan. Once Onion and garlic are soft add 1 Tbl. of the chili powder to the meat mixture and season with salt and pepper. Continue cooking until browned.

In a big pot mix together the beans, tomato sauce, and a little water from rinsing each can. Simmer and mix together. When beef mixture is finished, stir it in.

Now comes the fun part: My mom's recipe is simple; it calls for salt, pepper, sugar, and chili powder...that's all! Simple right!

BUT I couldn't leave it that simple, I like to add a few more things! Definitely add in those ingredients (I use less sugar than my mom, though.)  In addition to my mom's recipe, I like to add a few more things... paprika, cayenne, nutmeg, and cumin.

How much of each? Well that's the subjective part... you get to decide that for yourself, I don't usually measure. Just sprinkle... taste... smell... repeat. If that scares you to death, I put some suggestions above in parenthesis. Keep in mind these are very rough estimates because I don't actually measure... ever.

Overall this recipe is extremely easy, fairly quick, and absolutely delicious! Everyone has their favorite way to eat chili and here are some of the best ways for this recipe:
  • My favorite: with Frito's and sharp cheddar cheese mixed in! Mmmm, Frito Pie!
  • My Dad's: Leftover chili over spaghetti noodles, chili-mac style
  • My boyfriend Ben: with a dollop of sour cream and LOTS of cheese
  • My sister's: with lots of Frito's and all the beans picked off to the side :)

Doesn't really matter, just find your favorite way, and enjoy on a cool fall or winter day!


Thursday, May 6, 2010

Seared Tuna Steak


SOOOO simple... one of my favorite easy dishes. The only difficult thing can be finding fresh tuna steak at a grocery sore in the mid-west. When I find it, I always buy some!

What you'll need:
2 cloves garlic, chopped
red pepper flake
soy sauce
sesame oil
shallot (or onion)
ginger (ground or freshly minced)
olive oil
black pepper

All you do: Make just enough of the marinade to cover the tuna steak. Marinate the tuna in this mixture for about an hour (30 min would be fine). Heat up a skillet (or grill) to high heat and sear on each side for about 2-3 minutes. Watch it closely and don't overcook it. You still want it to be rare in the middle... at least I do! I usually blanch some edemame and light salt it for a side dish! Fresh, light, and irresistible in my book!

Sunday, March 28, 2010

Tilapia in a Pouch


I have been eating a lot of fish lately. Its tasty, good for you, quick...what else can a college student ask for (other than cheap)! Anyway, I usually just season the fish however I want it and then cook it in a skillet on the stove for a few minutes each side. Last time I wanted to try and bake it! The whole oven seemed like a waste for one tiny piece of fish, so I baked it in my little toaster oven...it turned out great!

What You'll Need:
  • Tilapia filet
  • olive oil to drizzle
  • salt/pepper
  • garlic
  • onion
  • mushrooms
  • red peppers
  • lemon slices
Now, this is just the way that I did it... you can use any combination of spices and vegetables you want in this. You could do it Asian style with some water chestnuts, soy sauce, bamboo chutes, and bok choy... Mexican style with tomatoes, peppers, onion, jalapeƱo, and taco seasoning... Italian style with fresh basil and lemon etc... really, the possibilities are endless.

All you have to do is sliver up the vegetables, chop your garlic, slice your lemon, season your fish, wrap it up in a foil pouch, and bake it at 375 degrees for 30-40 minutes until the fish is flaky. The worst part about baked fish is usually the tendency to dry it out. When it is wrapped up in the pouch though, it holds in the steam and the fish is pretty hard to overcook.

Wednesday, March 3, 2010

Spicy Asparagus Pasta


"Asparagus made into a pasta sauce...interesting..." That's what I thought too. Honestly, the first go round was "interesting" at best.

The original recipe I found used asparagus, but also called for A LOT of parsley in the sauce. Don't get me wrong, I like a little parsley here and there to lighten up a dish. However, I think my sister said it best when she pointed out that the first attempt tasted quite similar to grass.

I still liked the idea of the asparagus pasta sauce, though so I have fiddled around with this dish a few different times and the current (parsley free) version is by far one of my favorite vegetarian dishes.

What You'll Need:
Asparagus (estimate-depends on how much you're making, I used about a half a bundle)
3 cloves garlic (obviously increase if you make more)
Olive Oil
Salt and Pepper
Red Pepper Flake
Parmesan Cheese
Whole Wheat Spaghetti

Cut the asparagus into 1 inch pieces and blanch in boiling water for about 5 min. Ice it immediately to stop the cooking, blend up with garlic, olive oil, red pepper flake, and salt pepper. The seasonings are all just to taste. I love spicy food so I like to use about a teaspoon of red pepper flake to give it some heat! Use as much olive oil as you need to get to the consistency you want... probably a couple of tablespoons will do.

The end product is sort of like an asparagus pesto, mix over whole wheat noodles with freshly graded Parmesan. Genius...quite a change from its grassy beginning

Friday, October 23, 2009

Savory Balsamic Glazed Plums


Fall is officially here and with that comes plums! I thing plums are great but, for me, it has to be the right time of year... and October is the beginning of perfect plum season!

In addition to seasonal ingredients, I am a student with little free time. I love finding ways to spruce up left overs for a quick, yet delicious, dinner. This time the inspiration was left over pork loin and fresh plums.

I cut up the plums and saute them in a couple of tablespoons of some white wine, balsamic vinegar, brown sugar, cinnamon and nutmeg. As soon as they get soft and the glaze starts to thicken and coat the plums.

approximate measurements:
white wine 2 Tbl.
balsamic vinegar ~3 Tbl.
2 sliced plums
brown sugar ~1Tbl.
cinnamon, to taste, and a tiny bit of nutmeg

Pork and plums are a great combination. I used a pre-marinated, lemon herb, pork tenderloin and roasted it in the oven. These tenderloins are so easy and great the next day as left overs for sandwiches or something like this warmed up with fruit on top.

Wednesday, October 21, 2009

Delicious Fresh Green Beans

Summer is officially over, but I did get some good fresh green beans from the farmers market before the cold weather set in. Fresh green beans are so much better than canned you really cannot compare them to fresh at all. With fresh green beans I like the simple approach. Blanch and Saute.

Snap the ends off of the green beans and rinse them. Boil and salt some water. When the water boils, blanch the green beans for 4-6 minutes (depending on how thick and crispy they are). After taking them out shock them immediately by dropping them into a bowl of ice water for another 4-6 minutes to stop the cooking. You want the beans to be in the ice water about the same length of time as the boiling water.

Melt some butter and olive oil in a saute pan and saute the blanched green beans with the butter and olive oil for a few minutes. Season simply... I like them with salt, pepper, garlic powder and onion powder. Sprinkle some freshly graded Parmesan cheese over the top. There is no better, and simpler way to eat fresh green beans... I promise. Even my sister (who hates green veggies) will scarf these down!

Sunday, August 9, 2009

Frozen Key Lime Pie


As summer winds down to a close I MUST get this recipe out there before it gets to be chilly and fall. This frozen pie is not officially "key lime" as it is way to simple to be such and includes no such ingredient! It is simple, refreshing, tangy, and quite delicious! It always reminds me of summer and is one of my mother's few treats that always wins rave reviews! It's so simple and refreshing it's a must have at least once every year before the leaves start falling!

4 simple ingredients:
  • 1 can frozen limeade concentrate
  • 8 oz frozen whipped topping
  • 1 can sweetened condensed milk
  • pre-made chocolate oreo crust
  • 3 drops of green food coloring (not a true ingredient)
I promised simple and simple I will deliver: thaw the ingredients (if the whipped topping is not fully thawed it will not mix and it will be clumpy), mixing the limeade and sweetened condensed milk together with a spatula, and fold in the whipped cream. Pour into the pre-made crust, and after four short hours (or overnight) in the freezer... voila! Delish!

Tuesday, August 4, 2009

Easy Creamy Cheesy Pesto Spread


This is a recipe courtesy of my friend Emily's family friend, Veronica. In college Emily and I roomed together and Veronica was nice enough to send us a half-gallon container of this stuff every couple months. The tub usually only lasted a couple weeks! This stuff is as addictive as I imagine any drug could be (not that I would personally know)

So, after my recent blog about homemade pesto I couldn't resist making this delectable treat! It is SOOOOO easy and fast you wouldn't even believe it! Great on crackers (I prefer wheat thins) or sandwiches or raw veggies! I'm sure it would melt down nicely over hot noodles also to make a creamy cheesy pesto sauce.

I like making this with homemade pesto, but if you don't have any on hand or don't want to go to the trouble, it would be great with store bought pesto as well.

Four Simple Ingredients:
  • 2 oz Cream Cheese
  • 4 oz Goat Cheese
  • 1/4 c. Homemade Pesto
  • salt and pepper to taste
All you do... mix your pesto, cream cheese, and goat cheese together in a bowl with a spoon or spatula until it is all blended and smooth. Season it with salt and pepper to taste, and devour!!!

Monday, July 20, 2009

Carol Brownies


These brownies are my all time favorites! My aunt, Carol (whom I'm named after), used to make them all of the time, and when I was young she taught me the recipe and her technique. I don't think I appreciated the simplicity of the recipe until much later down the road, but the fact that you only need one bowl, one measuring cup, and a few ingredients that I always have on hand!

These brownies only take about 5 minutes to put together...easy and fast!


Carol Brownies:
1 c. sugar
1/2 c. flour
2 eggs
1 1/2 squares Unsweetened baking chocolate
1 stick butter
1 tsp vanilla (2 tsp is better!)


Melt the butter and chocolate in the microwave (or stove, but microwave is easier) just until all of the butter is melted. With a spatula stir the chocolate butter mixture until the chocolate is completely dissolved in the butter. If you heat the mixture too long to try and melt all of the chocolate, the butter will burn. Just melt the butter and use the residual heat to melt the chocolate completely. When you finish the mixture will be a silky chocolate liquid! A great beginning to any dessert.


After the mixture is completely melted stir in the sugar, followed by the flour so you have a thick chocolate mixture in your bowl. Next follow by the addition of one egg at a time. Stir in completely. Stir in the vanilla until completely incorporated and pour into a 9x9 inch pan.

Bake the brownies at 325 for 20-30 min. On my oven, 22 minutes is perfect!

If you must...you can add pecans to these. I like nut-less brownies because I can focus on the chocolaty deliciousness more that way without interruption... but i completely understand if you feel the desire to add some nuts. However, the first time, I would try at least half the pan nut-free to give them a fair shot!

Once the batter is in the oven, lick the bowl clean using spoon, spatula, fingers, tongue... any means of getting every last drop!

I have been known to eat the entire bowl of batter with a spoon (regretting it later)... If you are going to take the spoon method, I would recommend baking and then, if desired, take the spoon to the warm brownies before they completely set. Most likely you wont eat the entire batch this way, and then once they cool a bit more you still have some great brownies to eat the next few days (if they last that long...)

I usually double the recipe if my family is around because a single batch wont last more than a day... a double batch usually lasts about two.


Note: Do not ruin these brownies by using an electric mixer... my mom tried that once and took away all possible fudgy, moist properties these brownies had...